Protect the Memories That Matter Most
A new year of memorable moments awaits! Keep your photos and videos safe with ThePhotoStick® Omni.
SHOP NOW - GET 20% OFFWhy You Should Choose ThePhotoStick®

Easy to Use
Plug it into your computer, phone or tablet and let it get to work.

Massive Storage
Effortlessly back up 200,000+ photos and videos!

Keeps Your Photos Safe
Each and every file kept safely stored away from hackers.

30-Day Guarantee
All products are backed, starting on the day of delivery.
"If you want to get your photos found and sorted, and transferred to a portable device fast, then this is the way to go."
Tech Times


Effortless Photo & Video Backup
Organize Your Files
Automatically organizes your files neatly into folders so they're easy to find.
Your Memories Kept Safe
Never worry about your computer crashing or losing files in the cloud again.

Saves You Hours of Time
Backs up 1000s of files in minutes – doing it yourself would take hours!
Effortless On-Going Backups
Quickly backs up new files weekly to ensure you never lose recent memories.
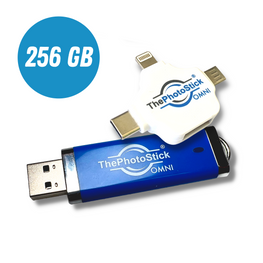
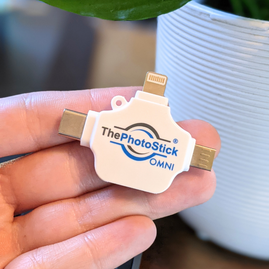
Meet ThePhotoStick® Omni
The small but powerful device that automatically finds, sorts, and safely backs up your photos and videos on ANY device

Back Up Over 12,000 Photos & Videos

Back Up Over 25,000 Photos & Videos

Back Up Over 51,000 Photos & Videos

Back Up Over 102,000 Photos & Videos
DON'T MISS OUT
NEW! ThePhotoStick Omni Case
Keep your precious memories with you no matter where you go!
ThePhotoStick Omni Case allows you to safely store your Omni devices while maintaining convenient access to your most treasured files.

Your Memories Inspire Us
At ThePhotoStick®, We Believe That Photos Are More Than Just Snapshots.
They’re Priceless Memories.
Accept No Substitutes!
ThePhotoStick® Original
ThePhotoStick is the original, trusted solution for effortlessly backing up and organizing your photos and videos. Don't be fooled by knock-offs; choose the trusted name in memory management. Ensure your memories are safe and secure with ThePhotoStick and our entire line of products.
SHOP NOW


Shop All Products
A Backup solution for everyone
Check out our entire line of ThePhotoStick® products and find the device that fits your needs.
SHOP NOWThousands of Happy Customers
Sign Up for Our Newsletter
Join ThePhotoStick Community!
Stay up to date on all things ThePhotoStick: Special Offers, Coupon Codes, First Access to New Products, and More

